Compiling PowerShell script to exe
Intro
I’ve been asked the question on “How can I turn my script to an exe-file” more times than I can remember. My answer has always been:
-“Just host Windows PowerShell in an executable and run what ever code you like.”
Scared of using C# most people has ignored my advice and used some kind of tool to do this, and there is no fault in that (as long as you choose a tool from a provider you trust, not a random tool from a shade site on the Internet). Today I’m going to show you how easy it is to embed a script in an exe-file.
Disclaimer Embedding a script in an exe does not make the code secret, it is very easy to extract your code from the binary file and this is NOT a technique you should use to hide your code or anything else that you don’t want users to read (like passwords)! Also I’m not saying this is recommended or even good to do, I’m just showing how easy it is to host Windows PowerShell in your own application and hopefully also that C# isn’t all that scary. Please consider this a Proof of Concept.
Prereqs
Before we start, we need some software. Visual Studio 2017 Community can be downloaded from https://visualstudio.microsoft.com/ and is free to use for Open Source projects. For any other use, please see the Visual Studio Community license terms. I’ll be using Visual Studio 2017 Enterprise in this example but it’ll look exactly the same in the Community or Professional editions. When installing make sure to select support for C# and you should be all good.
Creating a new project
Now, let’s get to it!
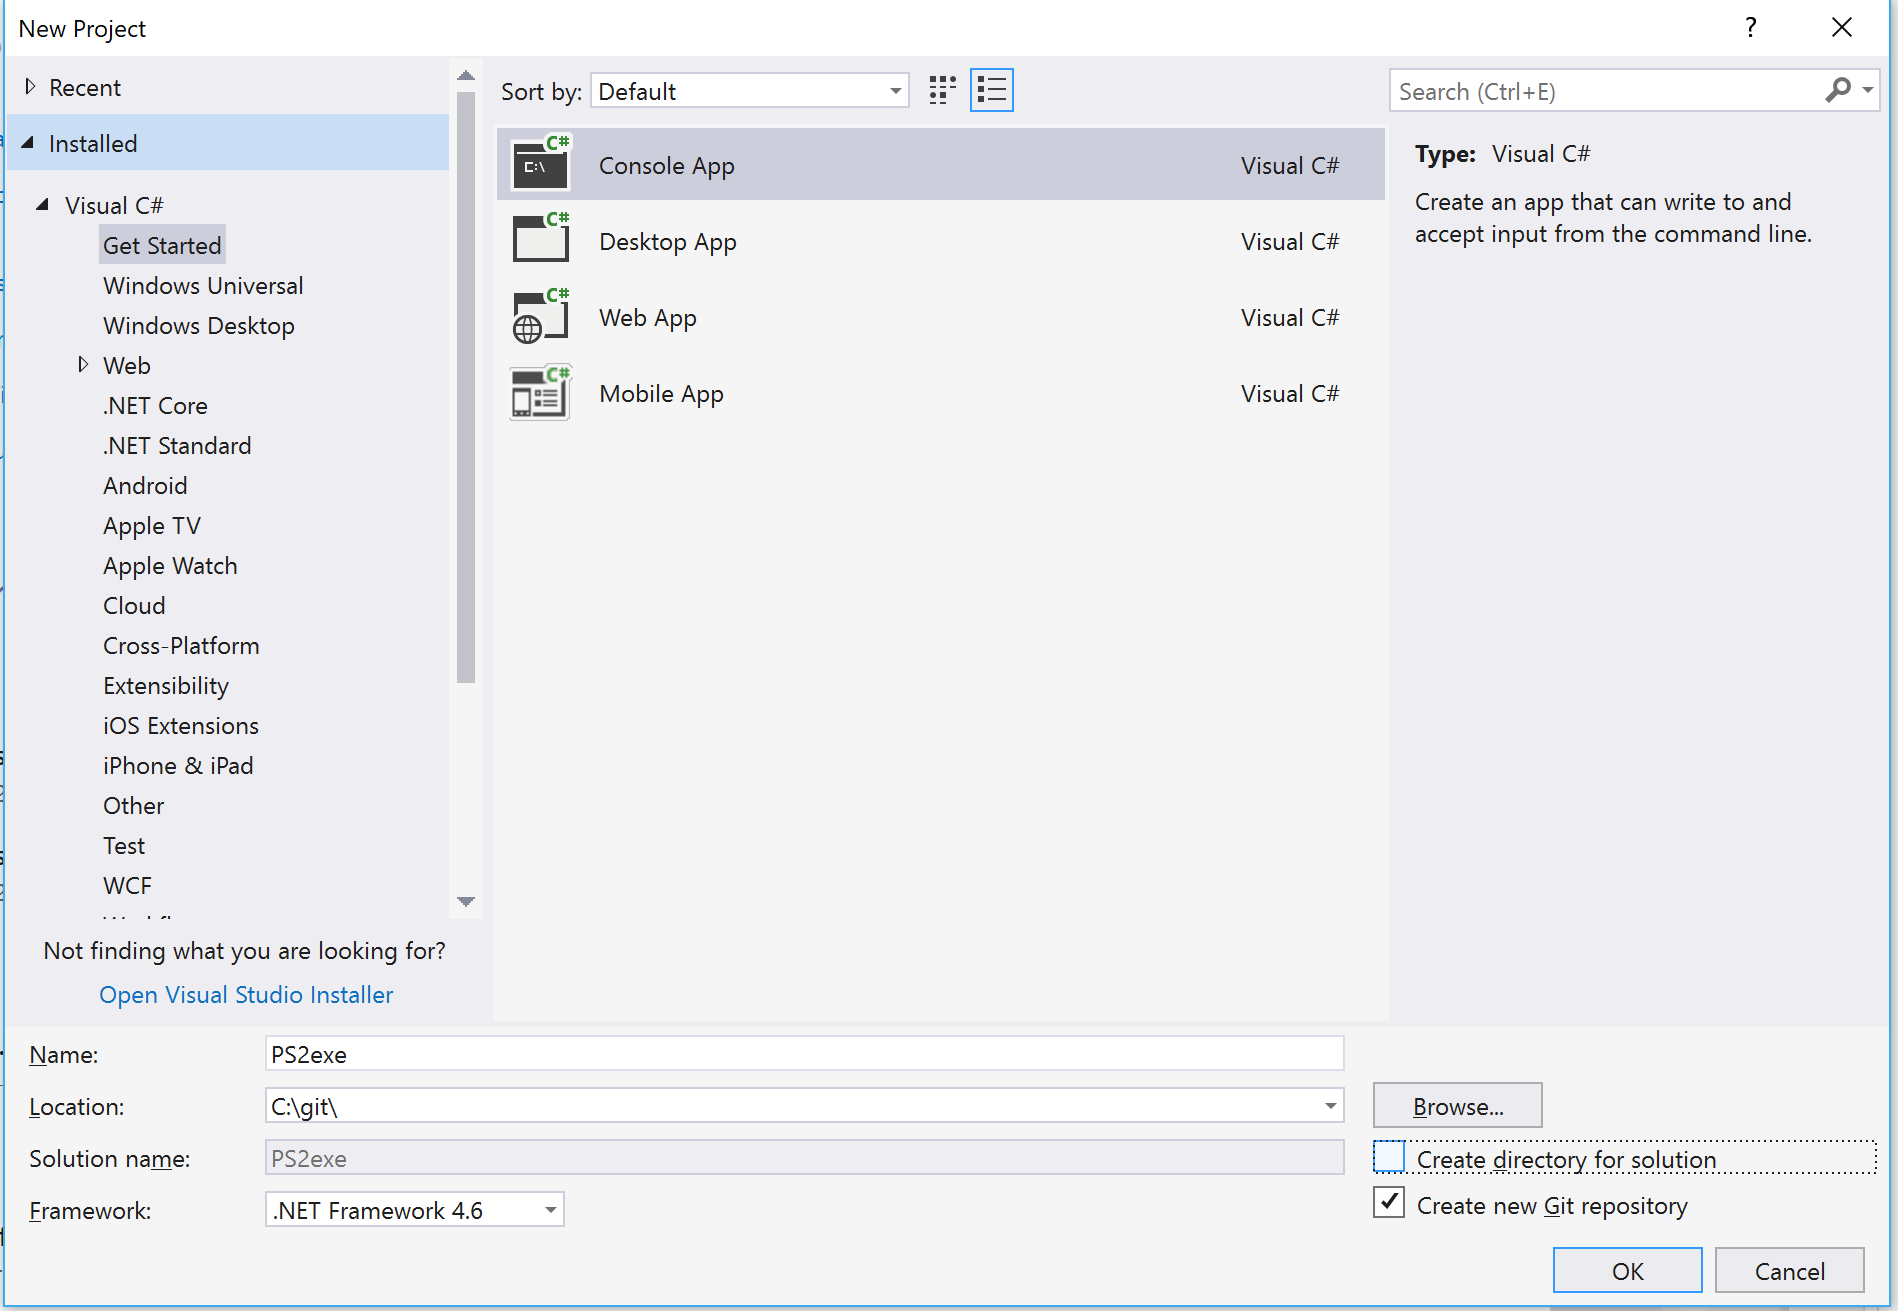
After firing up Visual Studio (it’s actually not that scary at all once you get used to it, stay with me and you’ll see) we need to create a new projcet by going File->New->Project. Under “Visual C#” you should find a template called “Console App”, select that and fill out the text boxes. I also let Visual Studio initialize a git repository for me but I don’t need a directory created for my solution since this project only will have one solution.
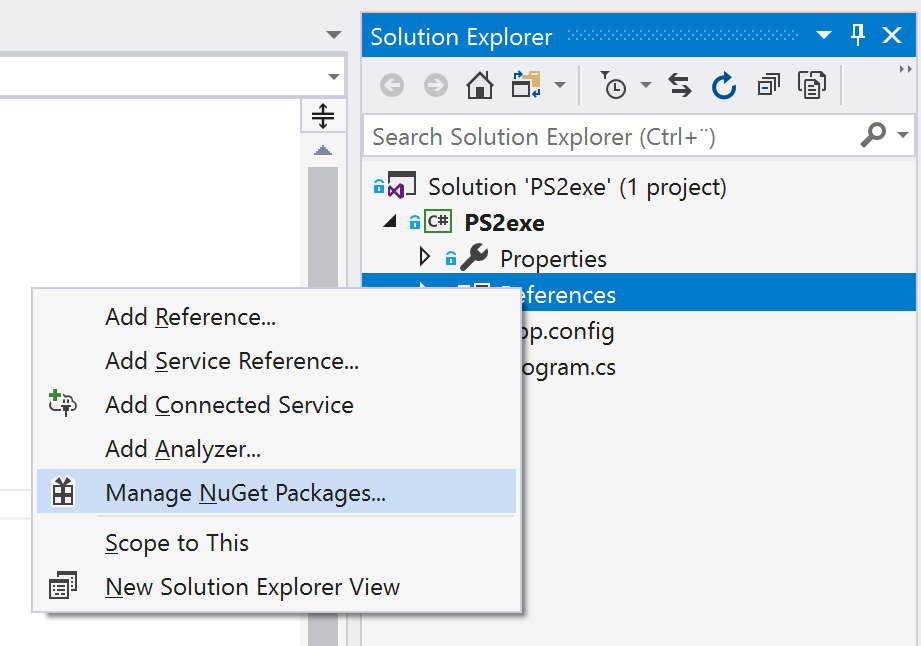
Next up, I need to add a reference to System.Management.Automation. (Sounds familiar? that’s where PowerShell lives!) If you, like me, are a Visual Studio noob you probably have the default layout and you’ll find the Solution Explorer in your upper right corner. If you some how misplaced it, don’t worry, just go View->Solution Explorer and it should pop up. In the Solution Explorer, right-click References and select “Manage NuGet Packages”.
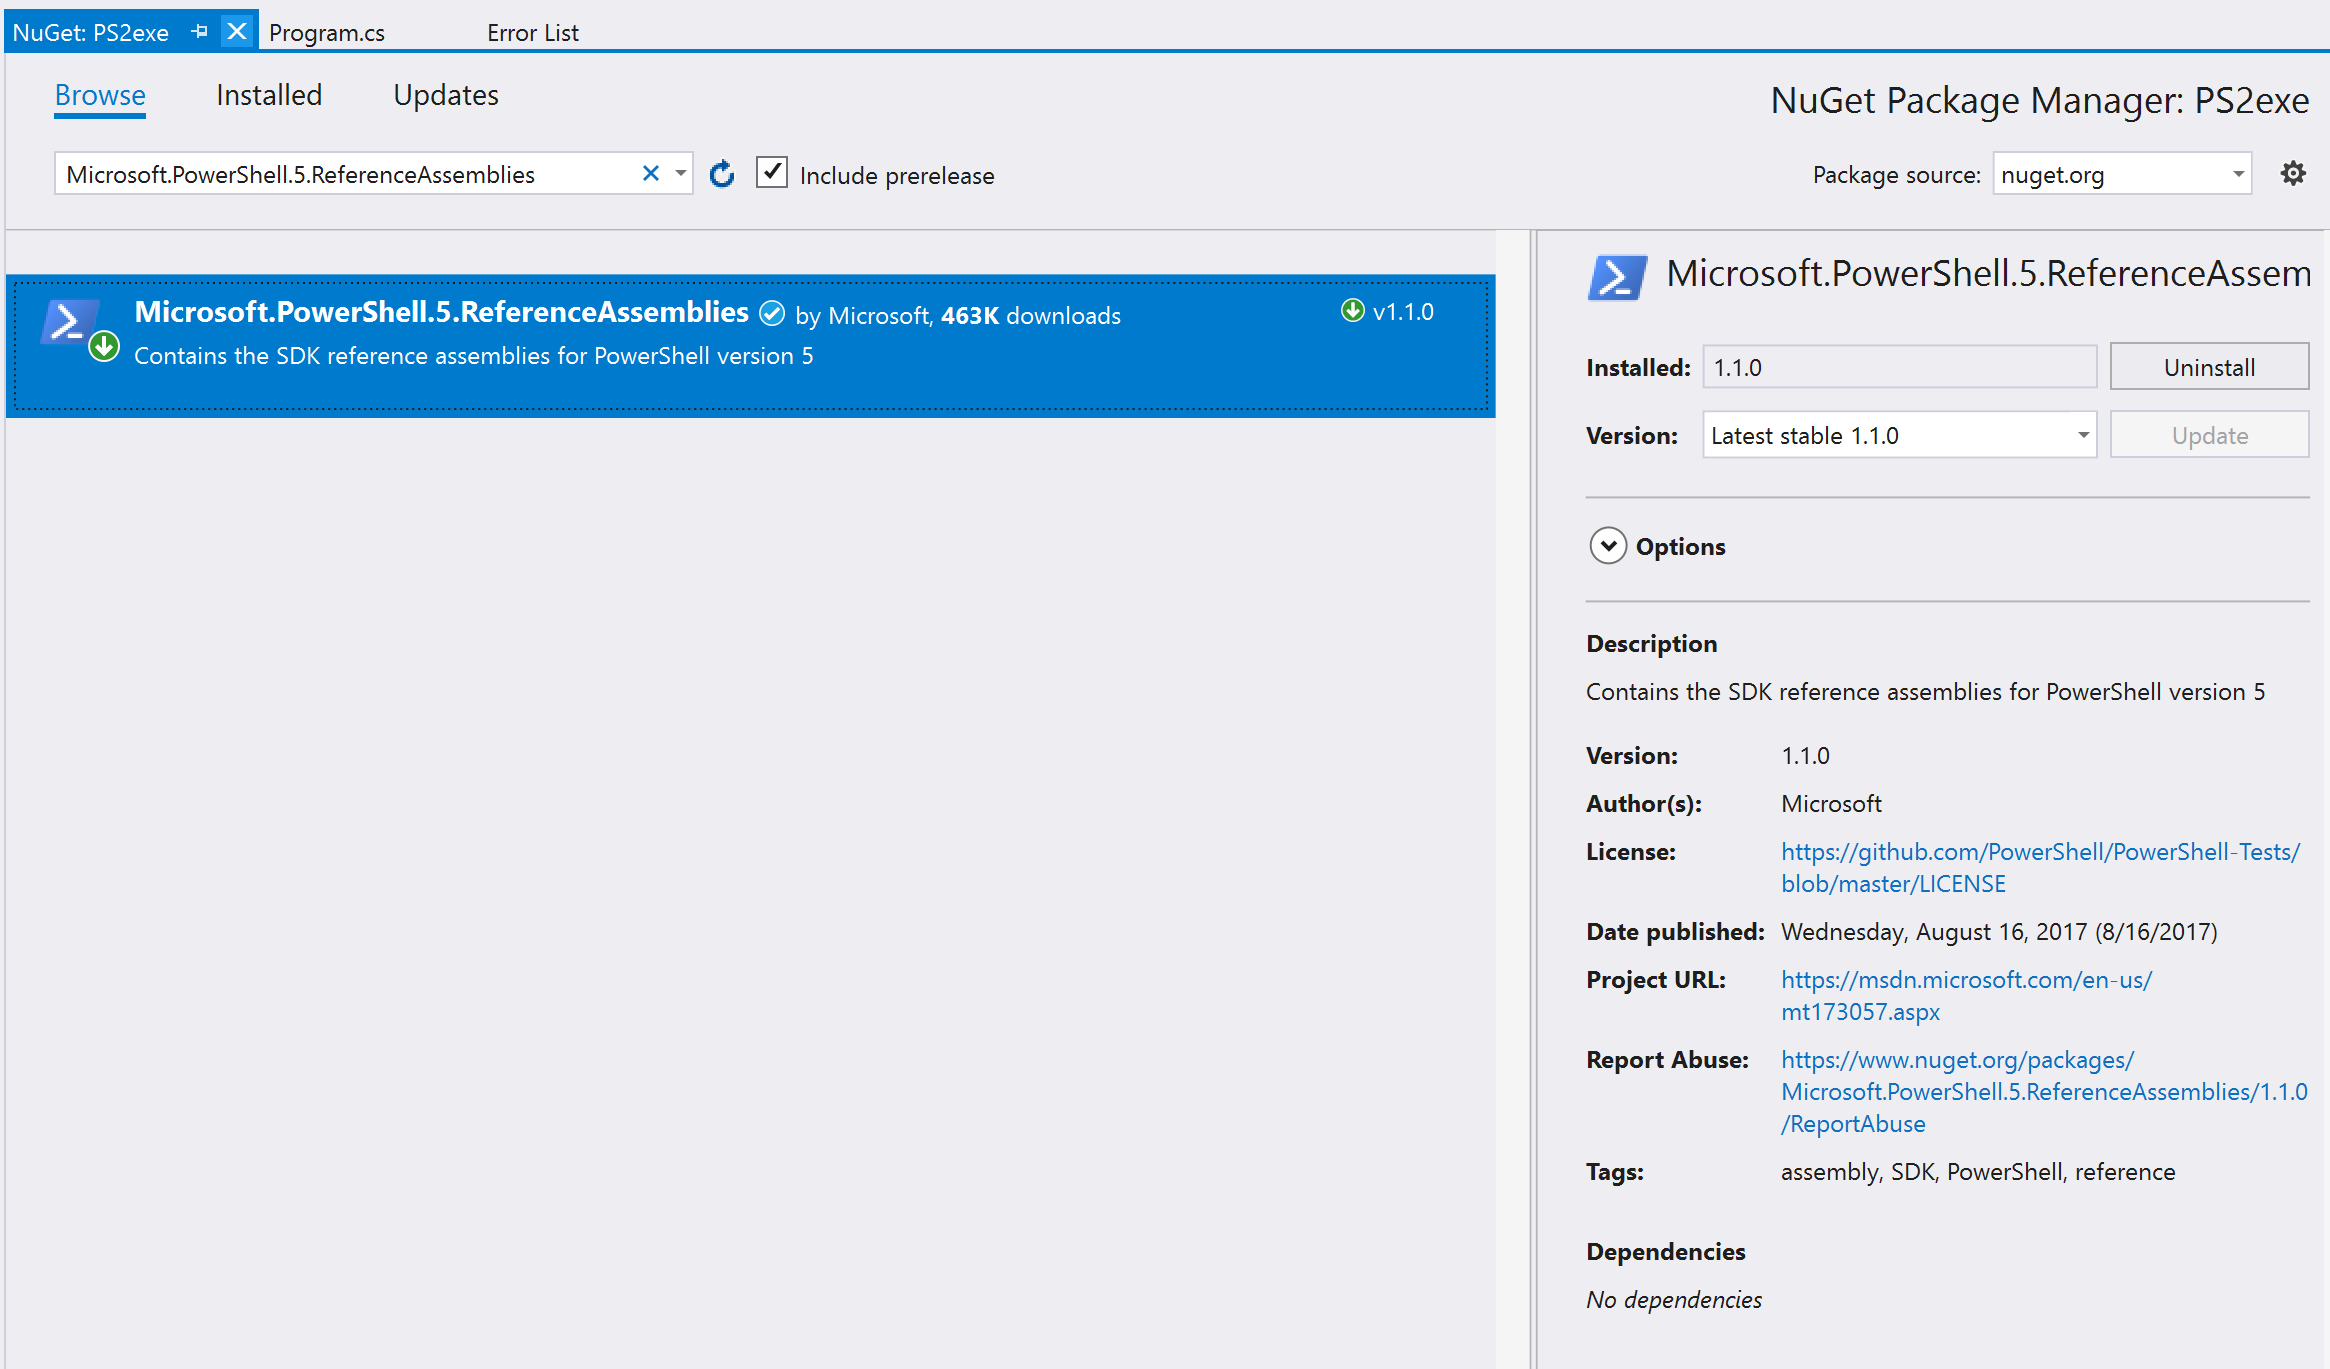
This is like a C# version of PowerShell Gallery, but for DLL-files. Go to the Browse-tab and enter “Microsoft.PowerShell.5.ReferenceAssemblies” in the search field and click Install. After agreeing to license agreement and such we are good to go and can close the NuGet tab.
Next thing we need to add a reference to a namespace by adding this line to the top of Program.cs:
using System.Management.Automation;
Now let’s create a script file where we can store our PowerShell code by right-clicking the Project PS2exe in the solution explorer, select Add->New Item… In this new window, choose Text File and give it Script.ps1 as a name. Now open Script.ps1 and put some PowerShell code in there. I’m just going to use a simple example:
Get-Service -Name W32Time
The last thing we need to do before we can start coding is adding Script.ps1 as a resource, this will make it available within our excecutable. We do that by rightclicking the Project PS2exe, clicking Properties and selecting Resources. This should tell us:
This project does not contain a default resource file. Click here to create one.
So let’s click “here”, which will give us a table-like view. On the top there’s a button called Add Resource. We click on that and choose Add existing file which lets us browse to and select our newly created Script.ps1. Hit Ctrl+S to save the properties and close the tab.
Writing some C#
Now it’s finally time to do some coding! Let’s open Program.cs and get started! It should now look something like this:
Let’s start by reading the content of our script file and put it in a string. If our script is encoded using UTF8 with a Byte Order Mark (BOM) we need to trim that away. I’m using these two lines to define chars to trim away and then read the whole script as a string:
var unwantedChars = new Char[] { '\uFEFF', '\u200B' };
var scriptString = Encoding.UTF8.GetString(Properties.Resources.Script).Trim(unwantedChars);
This is the C# version of what in PowerShell would look something like this:
$unwantedChars = [char[]](0xFEFF, 0x200B)
$scriptString = ([System.Text.Encoding]::UTF8.GetString($Properties.Resources.Script)).Trim($unwantedChars)
Quite similar isn’t it?
Next up we need to start an instance of PowerShell, this is what we need System.Management.Automation for. To make sure that our PowerShell instance exits and gets garbage collected correctly, we are going to use something called a using-statement. This will make sure that as soon as we are out of scope from our using-block, dotnet framework knows that it is OK to purge our PowerShell instance from memory and we won’t have problems with file locks and other bad stuff. It looks like this:
using (PowerShell ps = PowerShell.Create())
{
    ps
        .AddScript(scriptString)
        .AddCommand("Out-String");

    var result = ps.Invoke();
    foreach (var line in result)
    {
        Console.WriteLine(line);
    }
}
Here we are creating an instance of PowerShell and storing a reference to that in the variable ps. Then we call in the method AddScript to add our code to the pipeline. Calling AddCommand directly after will add a command to the pipeline, which would be similar to:
Invoke-Expression -Command $scriptString | Out-String
Now we have a pipeline created, but no code has been executed. To invoke the pipeline we simply call the method Invoke() and store the output in the variable result. Since we piped our script to Out-String we know that we only got strings back and can safely loop over result and write each line to the console.
Now be aware that we are only getting output from the output stream here (new to streams? Check out my post on streams), any errors, warnings or verbose messages are ignored.
Now we are done! You can test your solution by clicking Run in the toolbar or by hitting F5. When you are happy with the result you can remove the two lines writing “Hello World” and waiting for user input before exiting. Now build your solution by hitting F6 or using the menu and you will find your executable in .\bin\Debug\PS2exe.exe. If you change your build configuration to Release you’ll find the file in .\bin\Release\PS2exe.exe.
Now you can run your exe-file on any system running PowerShell 5! That wasn’t too hard was it? If you want you can download my project from GitHub and just replace the contents of Script.ps1 with your own code.
And who knows, maybe one day you’ll realaize that C# isn’t allt that impossible to learn and try it out some more.